
Details
4 weeks, MFA, 2019
Product and interaction design
Prototyping
Challenge
This project was about learning to design the inside of a product to better understand the work of an engineer and to be able to apply that thinking to our design work.
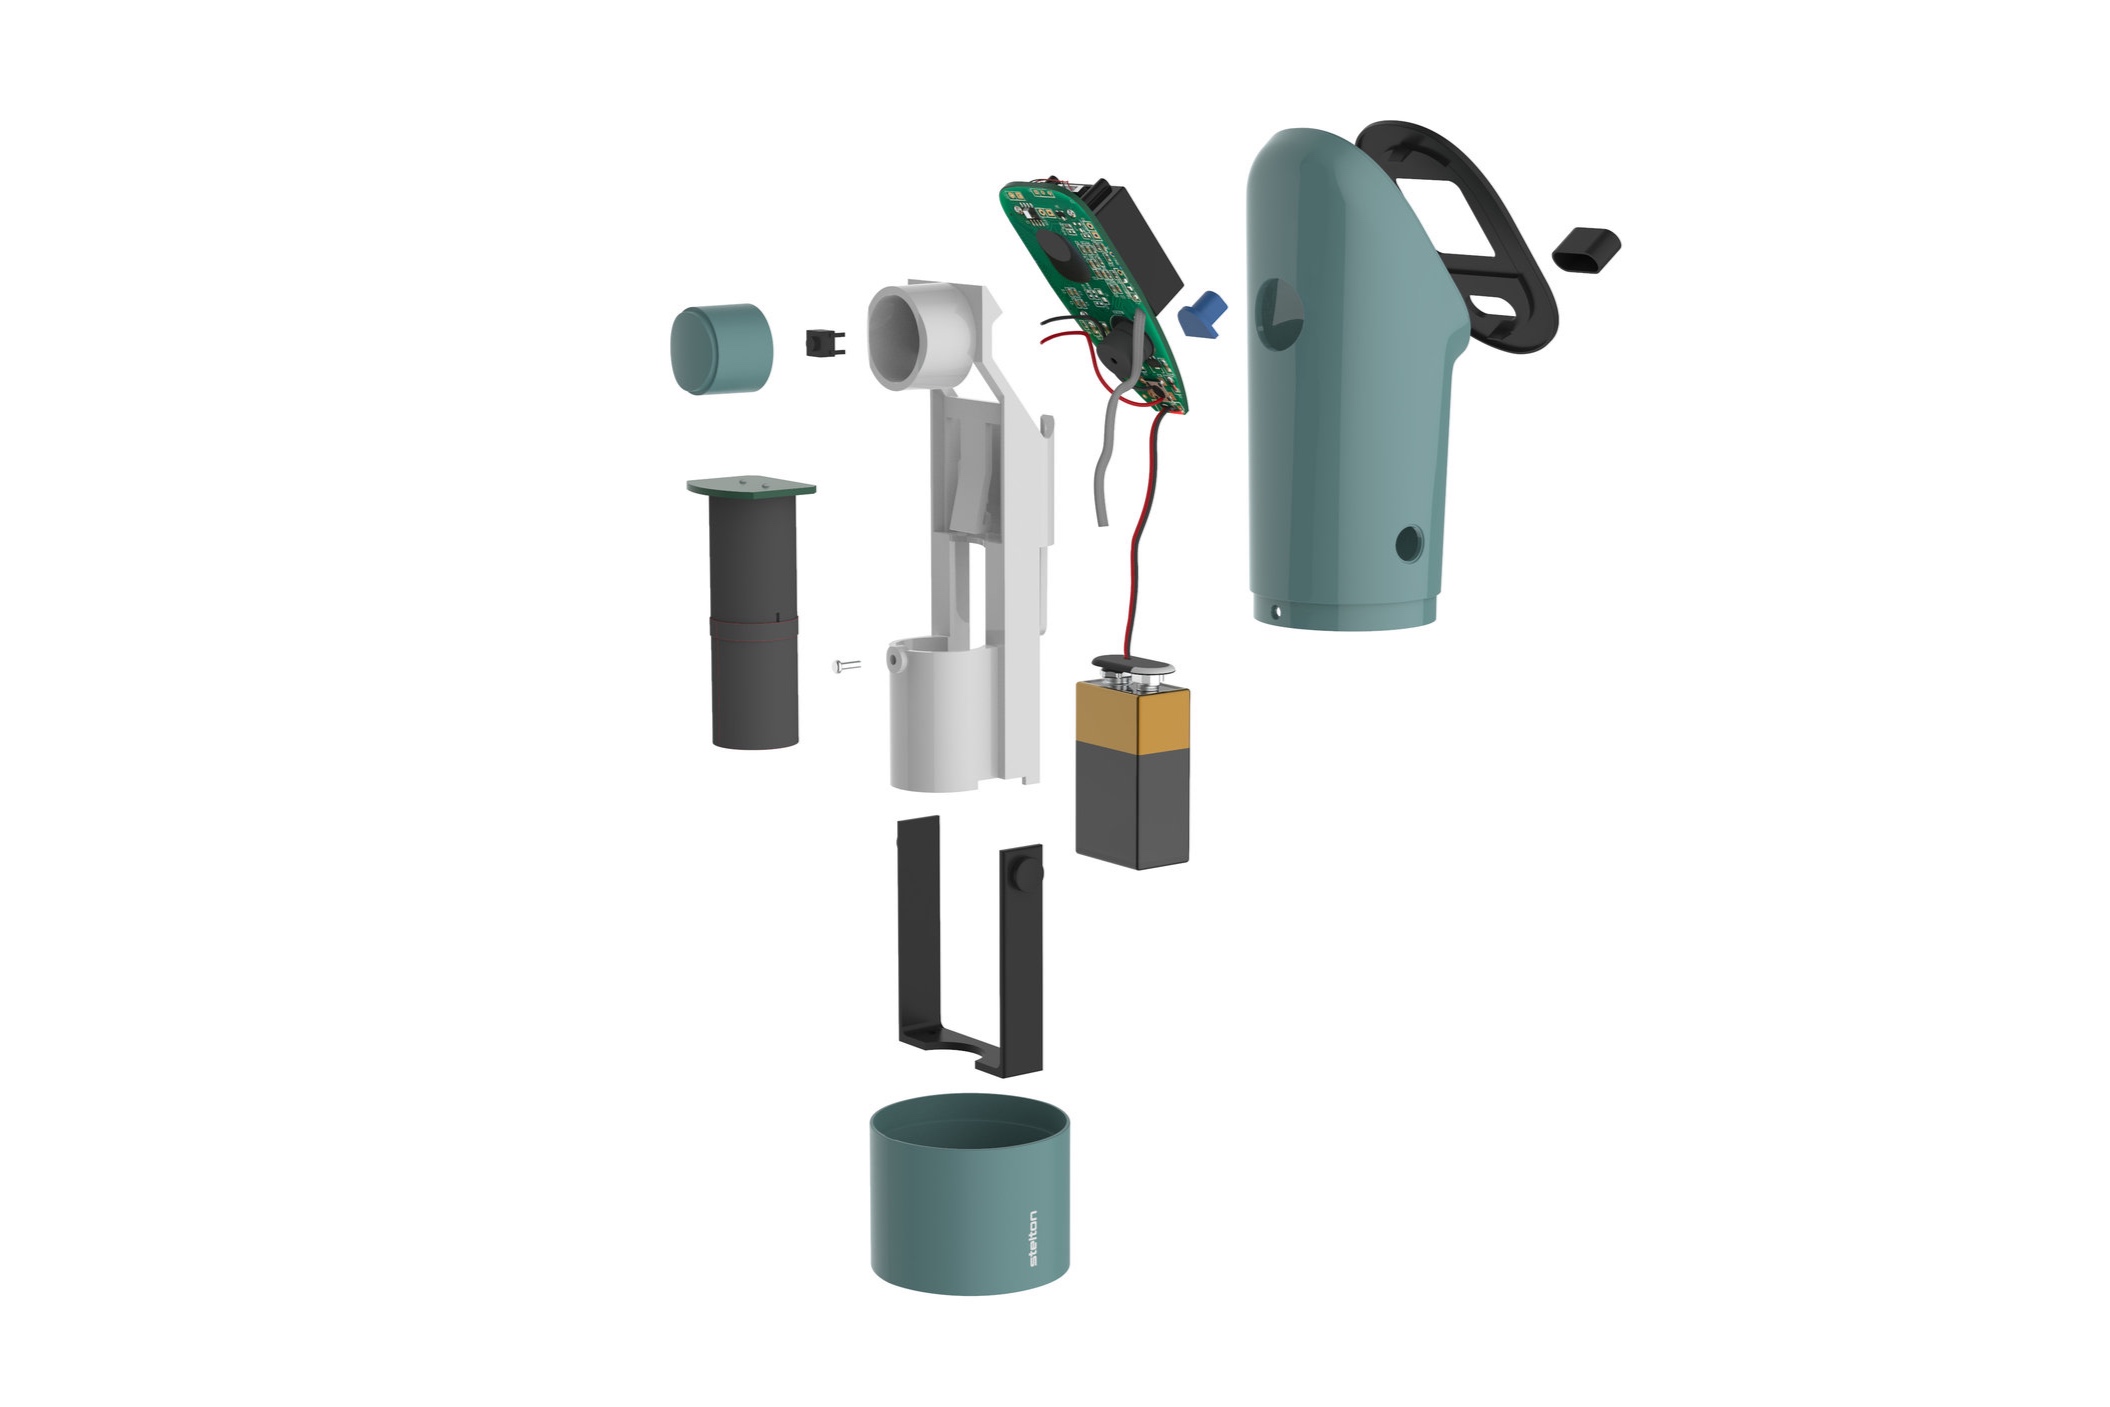
At the start we got an existing IR-thermometer. The task was to disassemble it, redesign (both the inside and outside) of it and then place the components into a 3D-printed shell of the new design - and get it to work again!
Concept
The final outcome of the project was a new, branded design of a working IR-thermometer prototype.
I chose to brand it for Stelton and focused on simplicity, easy maintenance and to create a functional design.


Concave button for opening the battery cap

Matte trigger button

Change of battery
By clicking on the black buttons at the same time as pulling down the lower matte part of the product, the battery gets visible and possible to change.

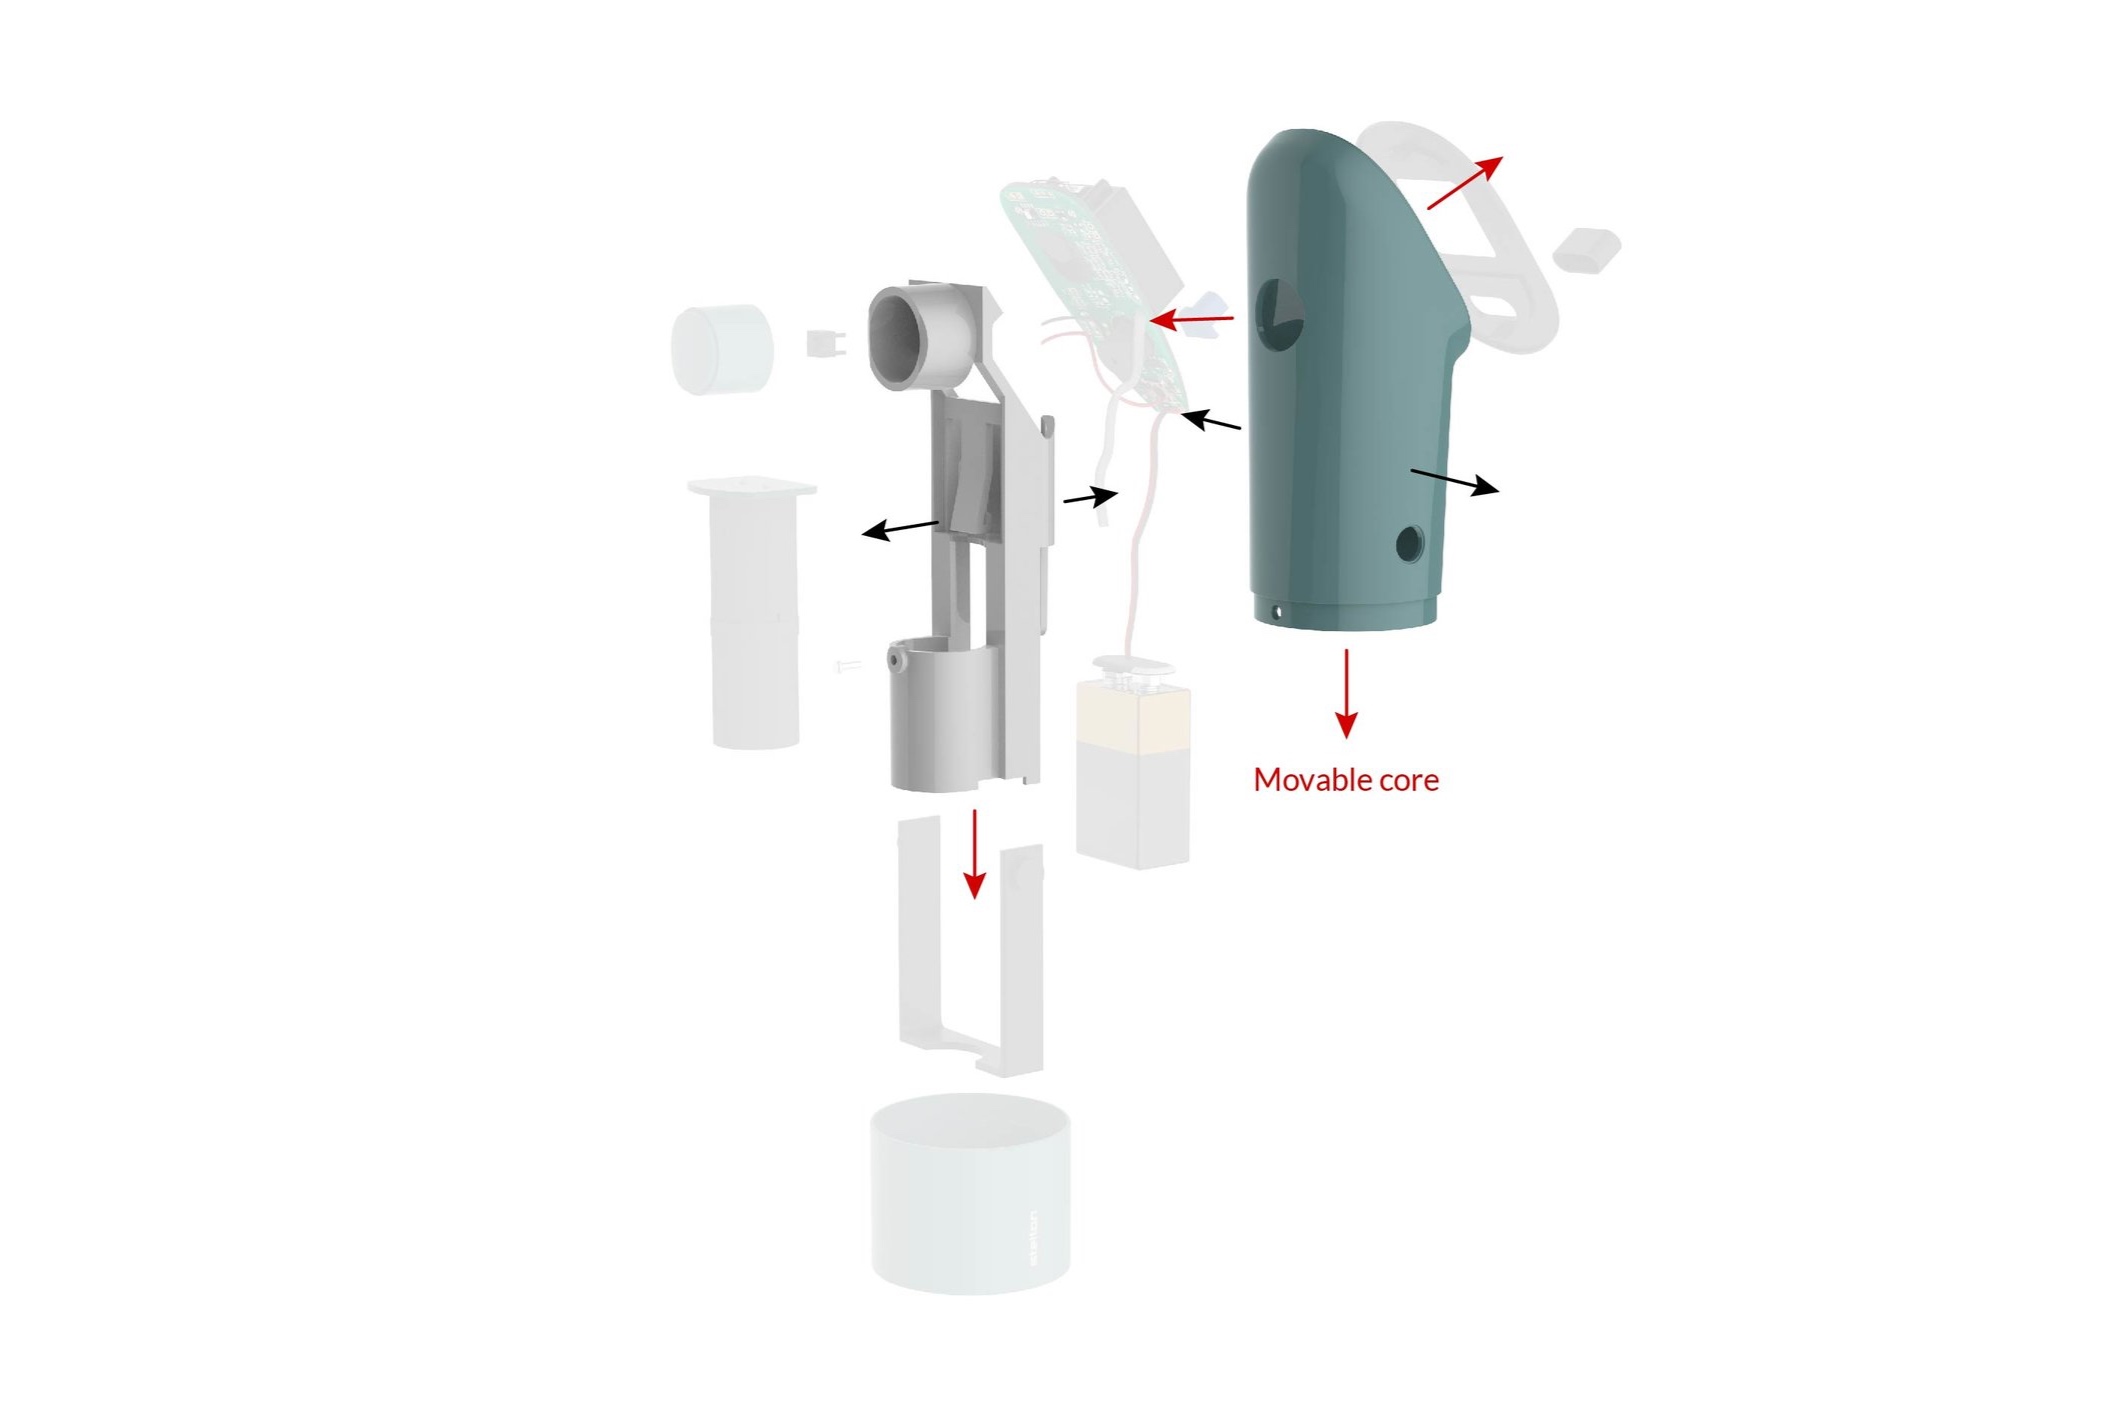
Repair a component
If a component breaks or needs to be updated, the customer or technician can easily drag out the whole inner construction from the shell by unscrewing one screw. When doing this all components get released, which enables change of components.
All parts of the IR-thermometer
Manufacturing
While designing the IR-thermometer I have been thinking of the manufacturing process of it. I have added drafting angles, snap hooks and lips. The main body of the IR-thermometer would be molded with three movable cores and the inner construction with one movable core.
Design process
Redesigning an IR-thermometer within 19 hours
Process video

Tracking working time
Everyone in the class got a time sheet of our teacher where we had to write down the amount of working hours spent on each activity through the ideation.
My goal was to manage to finalize my design within the proposed 19 hours. To do that I hade to be efficient, take fast decisions and stop working when time is out.
How to Redesign an ir-thermometer, use the components from the EXISTING one and get i to work?
Overview of my design process

1. Inspiration
2. Ideation

3. 3D mock-ups

4. User testing
(I spent 19h from step 1-4, until the design freeze)

5. CAD - Solid works
(46h)

6. Prototyping
(25,5h)
BRand board - stelton

I choose to work with the brand Stelton who does a lot of luxury kitchen products. The form language of Stelton is following the saying “less is more” and the products should have a design which makes the consumer leaving it in the front where it’s seen. My focus was on simplicity combined with iconic details and luxury material and finish.
Ideation process

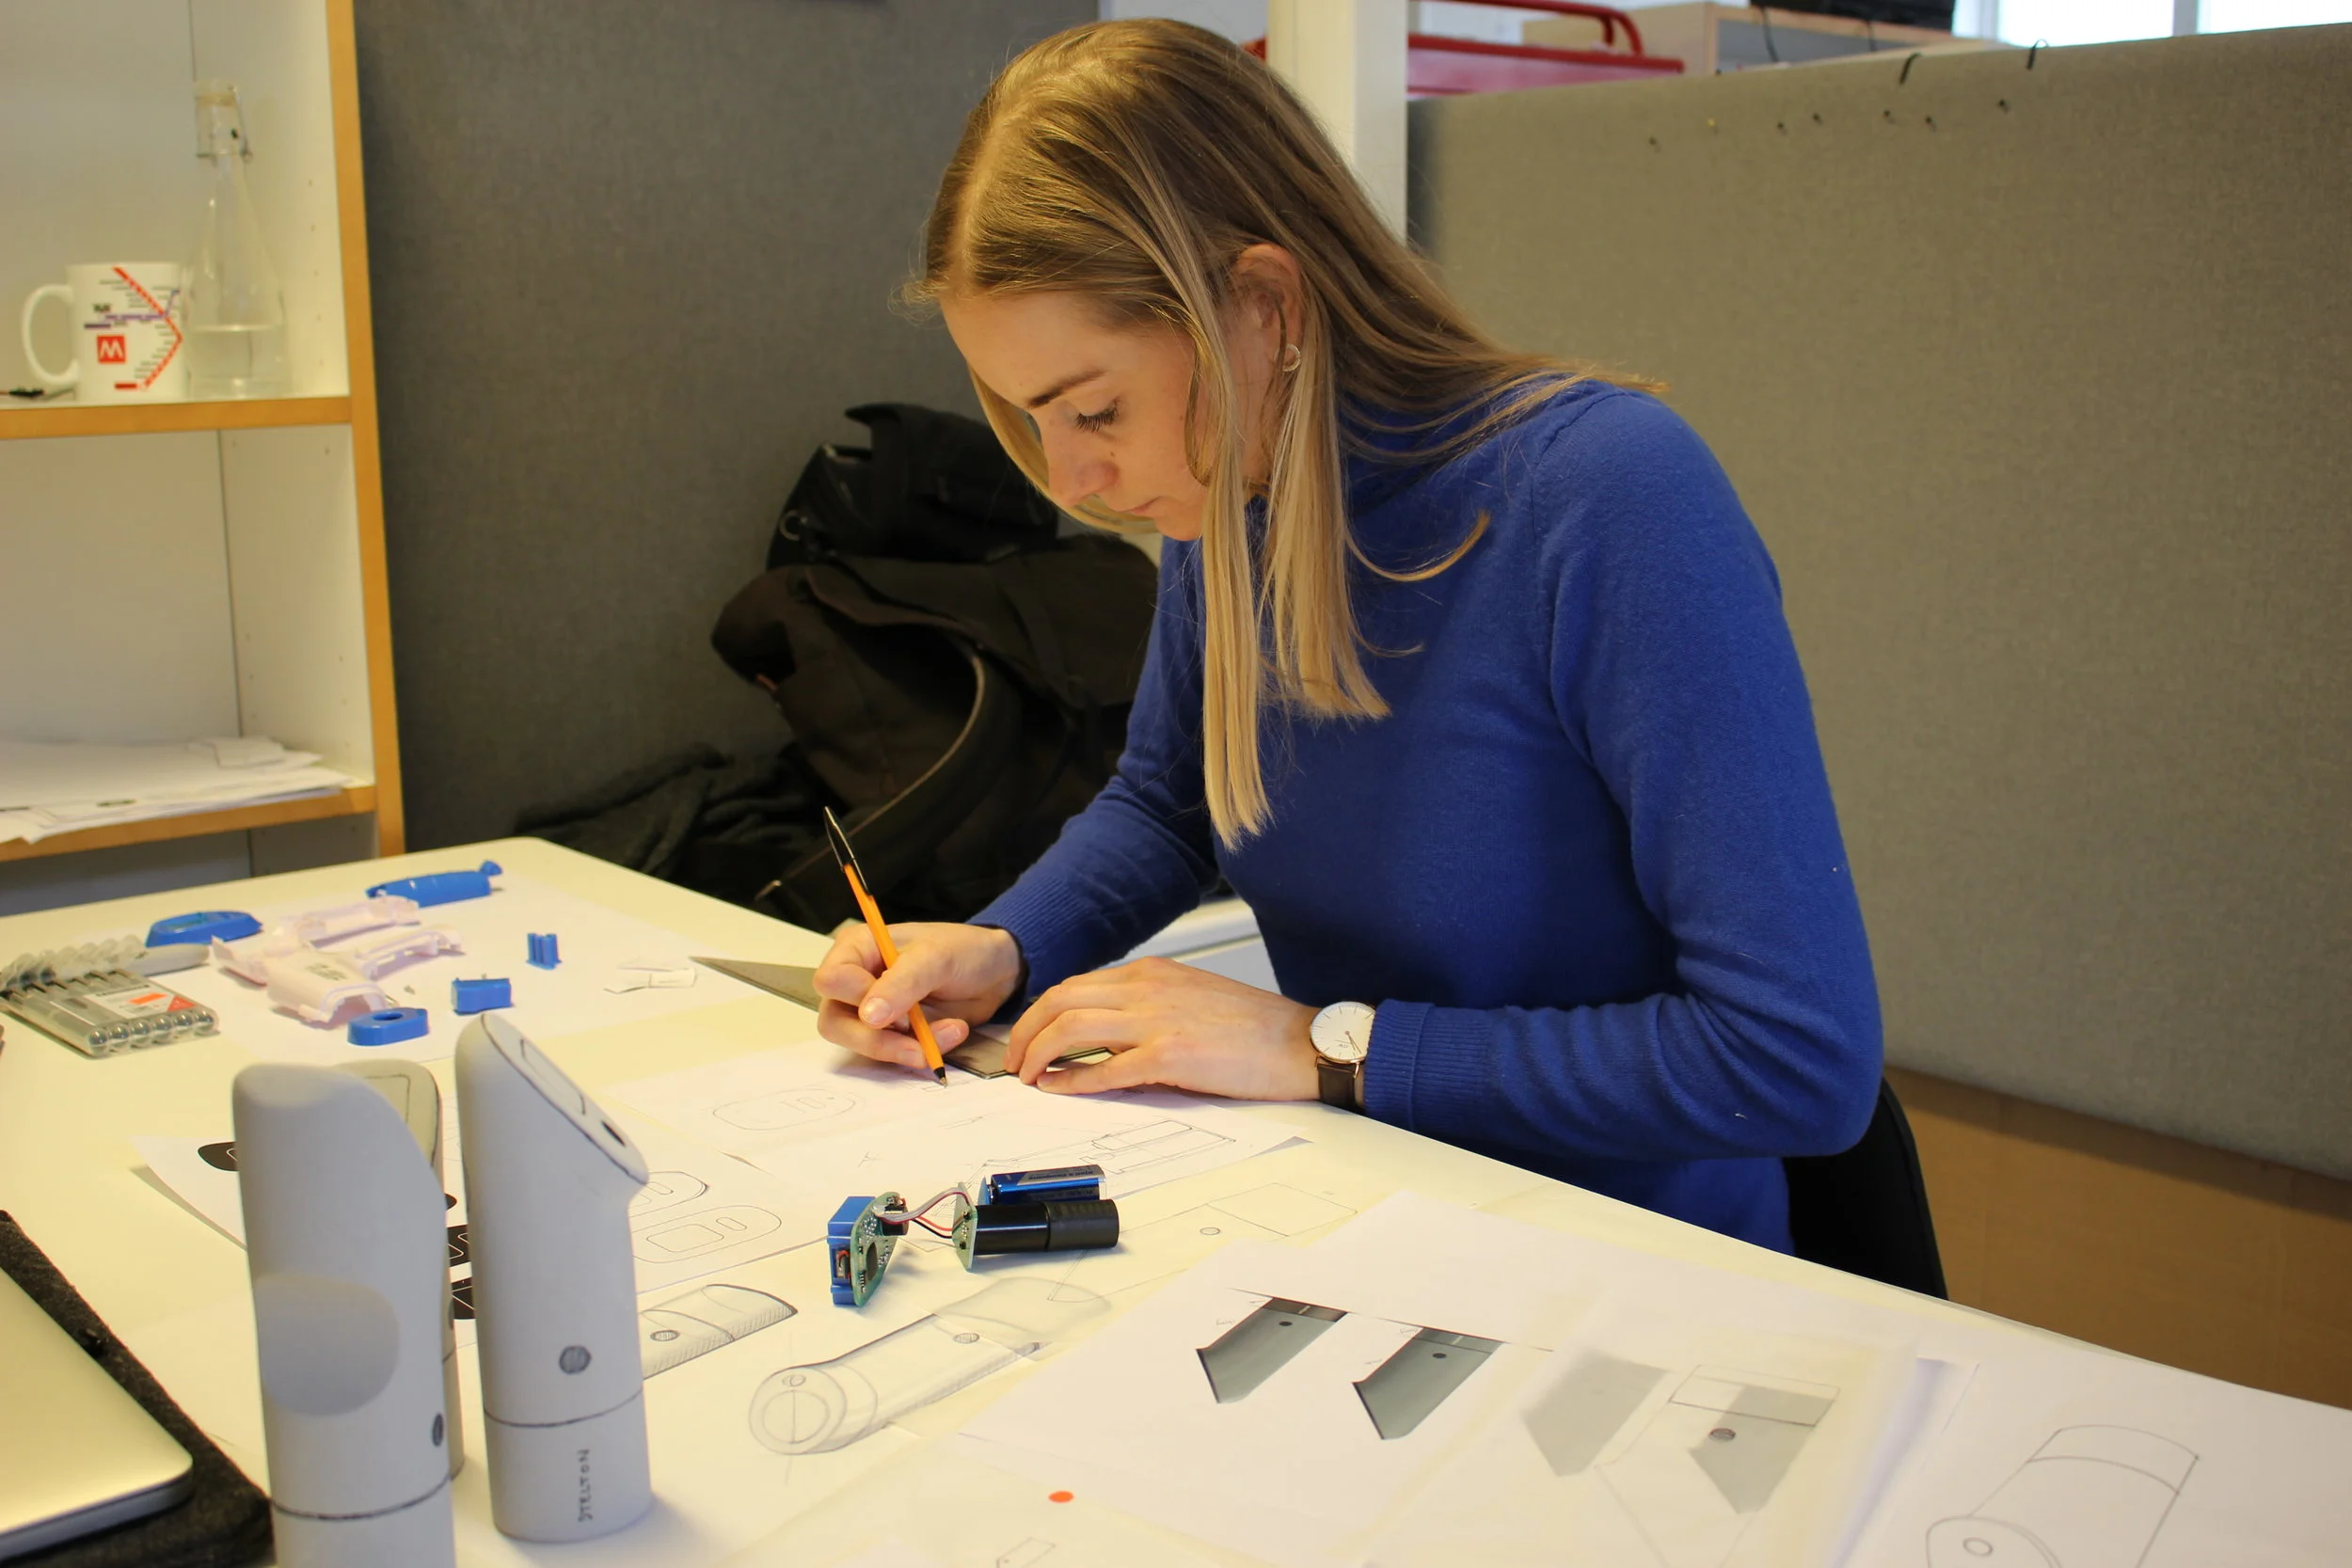
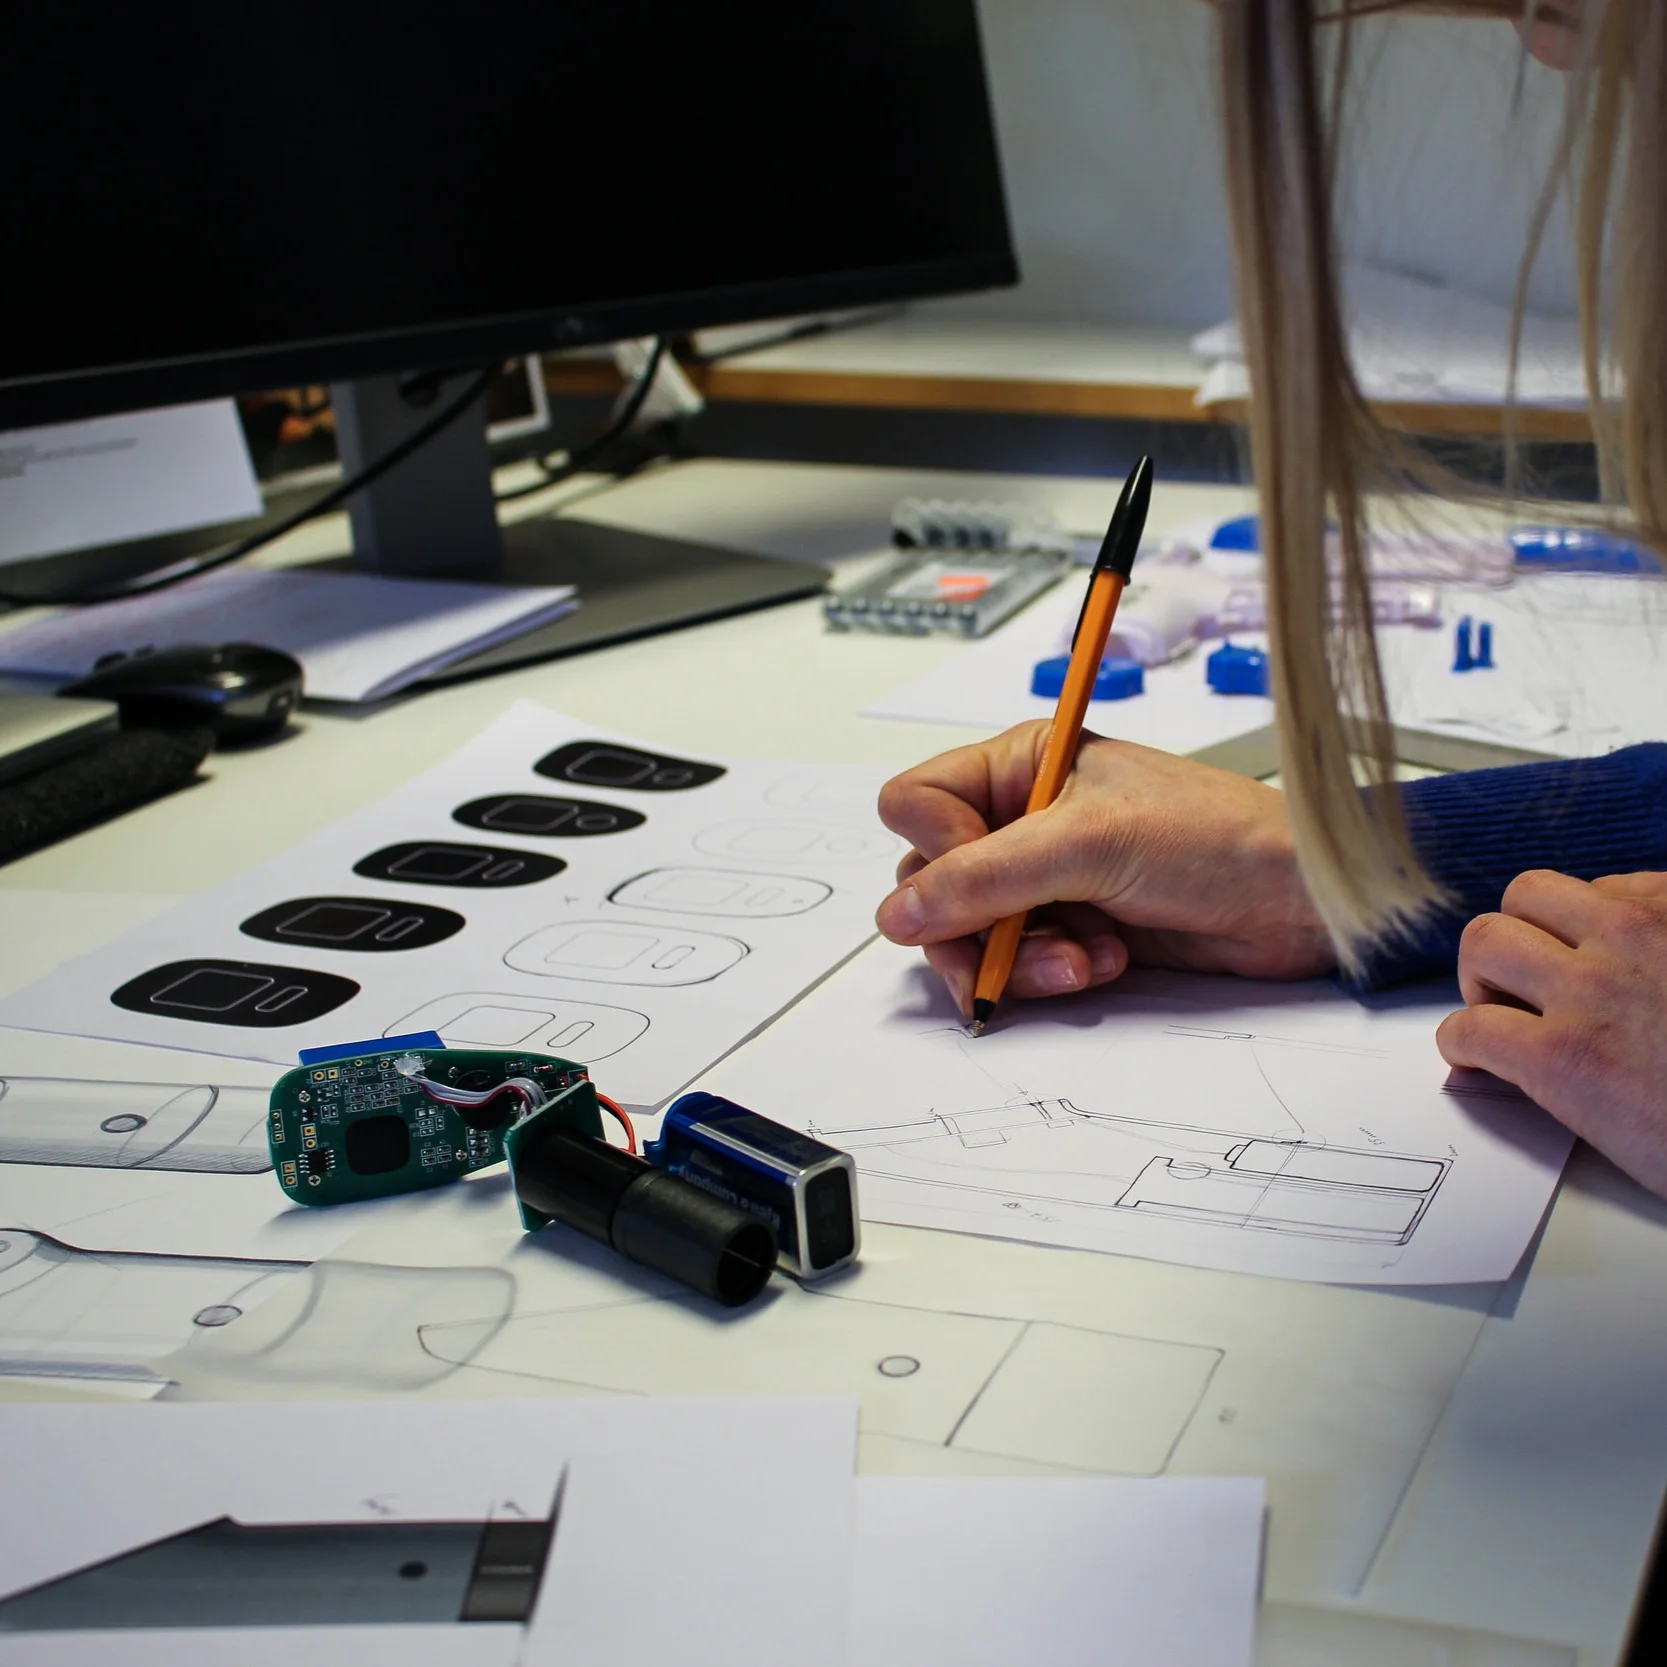
I started out with sketching many thumbnail sketches to explore a lot of different shapes in an effective way. Then I marked out my favorites that I thought would fit best to the chosen brand, Stelton.

After the thumbnail sketch session I did some 1:1 scale sketches and perspective sketches of some of my ideas, before starting to explore the shapes in foam.

Brand board and early sketches (thumbnails) presentation and feedback

Feedback session in groups with the teachers
building a working prototype
All parts of the prototype


An overview of my work
From an existing product, through mock-ups and sketches to a working prototype.
The messy 1:1 sketches to the right on the picture were the underlays to my CAD and modeling work - a lot to consider.
Final concept

The usage for this IR-thermometer could be when cooking or baking.
Color material finish
As all other Stelton products, the IR-thermometer comes in different color variations. I chose to show three variations of colors that I found trendy, Scandinavian and that fits to the brand. I made the top (screen) part and the battery buttons black, inspired by the classic Stelton thermos. The finish of the main part of the product is glossy and the lower (battery cap) part and trigger button, which the user will interact with, are made in a matte finish. The matte finish of the trigger makes it easy to feel when using the product.

Learning outcome:
This was my first time to design the inside of a product which I learned a lot from. For example about drafting angles, ribs, assembling and disassembling components, screw holes and screw towers.
Manufacturing methods
Improved my Solid works skills
Interaction design - soldering all components together
Assembling parts and components and get it to work